th8320r1003 installation manual pdf
Welcome to the comprehensive installation guide for the Honeywell TH8320R1003 VisionPRO 8000 Series thermostat․ This touchscreen programmable thermostat offers advanced comfort control and energy savings․ This manual will guide you through the entire installation process․
Overview of the VisionPRO 8000 Series
The Honeywell VisionPRO 8000 Series, which includes the TH8320R1003 model, represents a line of sophisticated touchscreen programmable thermostats designed for modern homes․ These thermostats are engineered to provide precise temperature management and energy efficiency․ They feature an intuitive interface and are compatible with various HVAC systems․ The series also incorporates RedLINK technology, allowing for wireless connectivity with other compatible devices, enhancing the overall smart home experience․ The VisionPRO 8000 series aims to make home climate control both convenient and effective․
Installation Preparation
Before beginning the installation, it is crucial to prepare adequately․ This involves verifying system compatibility and gathering the necessary tools and materials for a smooth process․
Checking Compatibility and System Requirements
Before installing the Honeywell TH8320R1003, verify its compatibility with your existing HVAC system․ This model is designed for various systems, but ensuring proper match will prevent issues․ The system should use either a C-wire or a Wire Saver for RedLINK accessories․ Confirm your voltage is compatible which is typically 24 VAC․ Refer to your existing thermostat and HVAC unit manuals to determine compatibility․
Gathering Necessary Tools and Materials
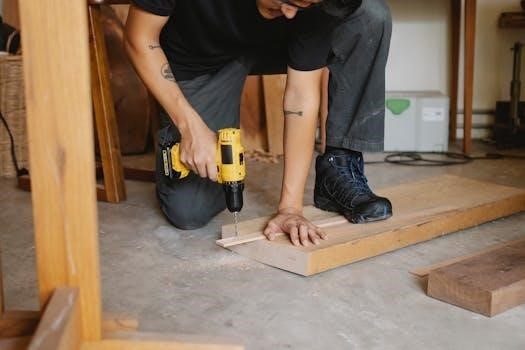
To ensure a smooth installation, gather the required tools and materials beforehand․ You’ll need a Phillips head screwdriver to secure the wallplate and thermostat; A small flathead screwdriver may also be helpful for wire connections․ Have wire strippers ready to prepare your thermostat wires, and possibly a voltage tester․ Additionally, gather any screws and anchors that may be needed for the wallplate, as well as the thermostat itself․
Wiring and Connections
Proper wiring is crucial for the Honeywell TH8320R1003․ This section will cover understanding wiring diagrams, connecting to the system transformer, and using C-wire or wire-saver options for power․
Understanding Wiring Diagrams for Different HVAC Systems
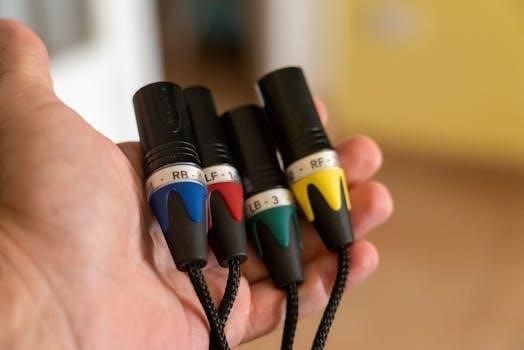
The Honeywell TH8320R1003 supports various HVAC systems, each with unique wiring requirements․ This part of the installation manual focuses on interpreting wiring diagrams specific to your heating, cooling, and heat pump setups․ Correctly identifying terminals and understanding the function of each wire, such as R, C, W, Y, and G, is essential for a successful installation․ Improper wiring can lead to system malfunction, so carefully follow the provided schematics․
Connecting the Thermostat to the System Transformer
Connecting the Honeywell TH8320R1003 to your system transformer is a crucial step in the installation․ The transformer provides the necessary 24VAC power to operate the thermostat․ Typically, the R wire from the transformer connects to the R terminal on the thermostat․ Ensure that the power is off before making any connections․ Double-check the wiring diagram for your specific HVAC system to avoid any errors that could damage the thermostat or system components․
Using the C-Wire or Wire Saver Option
The Honeywell TH8320R1003 requires a common wire (C-wire) for consistent power, especially when using RedLINK accessories․ If your existing system doesn’t have a C-wire, you can use a wire saver option․ This involves repurposing an unused wire or adding a new wire from the system transformer’s common terminal to the thermostat’s C terminal․ Refer to the installation manual for detailed instructions on using either the C-wire or the wire saver․
Installation Process
The installation process involves carefully mounting the wallplate and then securely attaching the thermostat to the mounted wallplate․ This ensures a stable and proper setup for operation․
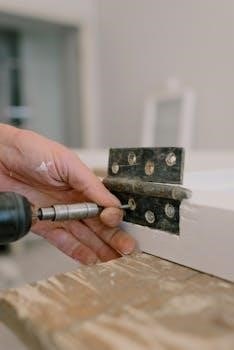
Mounting the Wallplate
To begin, carefully detach the existing thermostat from its wallplate․ Position the new wallplate on the wall, ensuring it is level․ Use the provided screws to securely fasten the wallplate to the wall․ It’s crucial to ensure the wallplate is properly and firmly mounted for proper thermostat attachment․ Double-check the level before fully tightening․ This step is critical for the final appearance and functionality of the thermostat․ Correct wallplate mounting will facilitate the subsequent steps of the installation process․
Attaching the Thermostat to the Wallplate
After securely mounting the wallplate, carefully align the thermostat with the wallplate․ Gently press the thermostat onto the wallplate until it clicks or snaps into place, ensuring a firm and secure connection․ Check that the thermostat is properly seated and flush against the wallplate․ Avoid forcing the unit; proper alignment is key․ This secure connection will allow the thermostat to function correctly and reliably, ensuring that the electrical contacts make proper connection․ Verify the fit before proceeding to the post-installation setup phase․
Post-Installation Setup
Following the physical installation, it’s crucial to configure your Honeywell TH8320R1003․ This involves initial power-up, system configuration, and setting up the RedLINK connection for enhanced features․
Initial Power-Up and Configuration
Once the thermostat is mounted, power it on to begin the configuration process․ The on-screen guided setup will walk you through the essential settings․ This includes selecting your HVAC system type, setting the date and time, and configuring basic operational parameters․ The intuitive interface eliminates the need for complicated manuals during this initial setup phase․ Ensure all parameters are correctly set to maximize the thermostat’s efficiency and performance․ This step is vital for the proper functioning of your new thermostat․
Setting up the RedLINK Connection
If your system includes RedLINK accessories, proceed to establish the wireless connection․ This process typically involves selecting the RedLINK option on the thermostat’s menu and following the on-screen prompts․ Ensure your RedLINK devices are powered on and within range of the thermostat․ The successful pairing will allow for remote control and monitoring capabilities․ Refer to the RedLINK device manuals for specific pairing instructions․ A stable RedLINK connection enhances the smart home integration for this device, allowing for seamless operation․
Advanced Features and Operation
The Honeywell TH8320R1003 offers a range of advanced features․ These include a touchscreen interface, programmable scheduling, and RedLINK connectivity for enhanced smart home integration and remote control capabilities․
Navigating the Touchscreen Interface
The Honeywell TH8320R1003 features an intuitive touchscreen interface, designed for easy navigation and control․ The display provides clear access to temperature settings, scheduling options, and system status․ On-screen prompts guide users through various functions, eliminating the need for complex manuals during basic operation․ The responsive touchscreen ensures a smooth experience, making it simple to adjust settings and manage your home’s climate․ The interface provides a user-friendly experience for all users․
Programming Schedules and Settings
The Honeywell TH8320R1003 allows for flexible programming of schedules and settings to optimize comfort and energy efficiency․ Users can create personalized heating and cooling schedules for different days of the week․ The thermostat offers various programmable periods per day to accommodate diverse lifestyles․ Adjusting temperature setpoints and system modes is intuitive through the touchscreen interface․ This capability ensures precise climate control and minimizes energy consumption․ The user-friendly programming options are designed for ease of use․
Troubleshooting
This section addresses common installation issues and their solutions․ We provide guidance on resolving power and connection problems․ Proper troubleshooting ensures optimal thermostat performance and avoids unnecessary delays․
Common Installation Issues and Solutions
During installation, you might encounter issues like incorrect wiring, leading to the thermostat not powering on or not controlling the HVAC system properly․ Another common problem is a missing C-wire, which is necessary for consistent power․ Check all wiring connections against the diagrams provided in the manual to ensure accuracy․ If the screen remains blank, verify the transformer’s power and all wiring connections․ Always consult the guide for detailed solutions․
Addressing Power and Connection Problems
If your Honeywell TH8320R1003 isn’t powering up, first verify that the system transformer is providing adequate 24VAC power․ Check all wiring connections for secure and correct placement, particularly the C-wire if you’re using it․ For wireless RedLINK connections, ensure proper pairing between the thermostat and the equipment interface module․ If problems persist, ensure batteries, if used, are fresh․ Consult the installation manual for specific troubleshooting steps and wiring diagrams for guidance․
Additional Resources
For further assistance, consult the user manuals and installation guides available online․ Contact Honeywell support for personalized help․ These resources provide detailed instructions and troubleshooting․
Accessing User Manuals and Guides
To access the user manuals and guides for the Honeywell TH8320R1003, visit the official Honeywell website․ You can find the installation manual and other relevant documents in PDF format․ These resources provide detailed instructions and wiring diagrams․ Download and review these guides before starting your installation․ They are essential for understanding all the thermostat’s features and functions․ The manuals offer step-by-step instructions ensuring a smooth and correct installation․ These guides will assist with any troubleshooting․
Support and Contact Information
If you encounter issues during the installation or have questions about your Honeywell TH8320R1003, several support options are available․ Visit the Honeywell website for detailed FAQs and troubleshooting guides․ You can also find contact information for customer support, including phone numbers and email addresses․ For technical assistance, you can reach out to their support teams․ They are trained to help with installation and operational questions․ Remember to have your thermostat model number ready when contacting support for faster assistance․


Leave a Comment